A loud bath fan has a way of making the whole room feel cheaper than it is. For many U.S. homeowners, exhaust fan replacement is less about the ceiling grille and more about getting steam, odor, and rattling noise under control before paint peels or drywall stains. The fix starts with sizing, duct path, and sound rating, not with grabbing the first fan that fits the hole. A better unit can run softly, clear moisture faster, and use less power, but only when the ceiling, wiring, and vent route all agree with the choice. This is the kind of home upgrade where a small mistake hides above your head for years. A 5-by-8 bathroom in Ohio with a long attic duct needs a different plan than a powder room in Phoenix with a short wall run. Good home improvement planning treats that difference as the whole point. Think of the new fan as part appliance, part moisture control, part roof and wall protection.
Start With What the Old Fan Failed to Do
Most people notice the noise first, because noise is annoying. The deeper clue is usually what the fan leaves behind after a shower: fog on the mirror, wet paint at the ceiling line, a musty towel smell, or a grille packed with gray lint. Noise matters, but moisture tells the truth. If the old fan sounded like a blender and still left the room damp, a quieter motor alone will not solve the room. Start by treating the existing fan like evidence. It can tell you whether the problem is power, airflow, installation, or neglect.
Read the room before you read the box
Stand in the bathroom with the door closed and think through what happens after a normal shower. If the mirror clears in a few minutes, the current duct path may be decent, even if the motor is worn. If steam lingers long after the water is off, the fan may be undersized, blocked, or vented through a weak route. A quiet bathroom fan should not need to roar to prove it is working.
The ceiling can reveal more than the switch. Brown rings around the grille suggest condensation or roof cap trouble. Peeling paint above the shower often points to poor bathroom ventilation, but the problem may be the duct, not the fan. In older homes around the Midwest and Northeast, it is common to find a flexible duct sagging across attic insulation like a tired garden hose. Water collects in those low spots, then the fan fights against it.
A non-obvious point: a louder fan can hide failure. The old unit may sound powerful because the motor is straining against a clogged damper or crushed duct. Replacing it with a better model without checking the path can make the room quieter and still leave the air trapped. A family may spend money on a premium fan and still wipe the mirror by hand every morning.
Check size, sones, and the duct before buying
The fan CFM rating tells you how much air the unit is meant to move under test conditions. Sones tell you how loud it should sound. Those two numbers should be read together. A 110 CFM model with a low sone score looks appealing, but if it is pushed through a narrow, kinked, 3-inch duct, the installed result may hum, whine, or move less air than expected.
Many standard full bathrooms use fans in the 50 to 110 CFM range, while larger rooms or bathrooms with separate enclosed toilet areas may need more planning. The Pacific Northwest National Laboratory’s Building America guidance notes that bathroom exhaust fans used for intermittent operation are commonly selected above the minimum airflow because installed airflow can drop once duct resistance is added. That is why the box rating is not the whole story.
Before you order anything, remove the grille and measure the existing housing. Look at the duct diameter if you can see it. Check whether the fan vents through the roof, wall, or soffit. A soffit exit can work in some designs, but it can also dump moist air where it gets pulled back into the attic. That is a local code and building-science question, not a cosmetic choice.
Take one more measurement most people skip: the grille footprint. A new fan with a smaller cover may expose an unpainted ceiling ring or old texture line. That does not ruin the project, but it changes the finish work. A calm upgrade can turn messy when the last half inch was never measured.
Exhaust Fan Replacement That Starts With Air, Not Noise
A good swap starts with airflow because comfort follows function. The quietest fan in the aisle will disappoint you if it cannot clear humidity. The strongest fan will annoy you if it shakes a flimsy housing. The sweet spot is not the biggest motor. It is the unit that matches the bathroom, the duct, and the way your household uses the space. That is why buying by brand alone is weak planning. The room should choose the fan before the logo does.
Match the fan CFM rating to the actual bathroom
For a simple 40-square-foot hall bath with one shower, a modest airflow target may work well if the duct is short and smooth. For a 100-square-foot primary bath with a soaking tub, shower, and separate toilet nook, one ceiling fan may not pull air evenly from every wet zone. In that case, location matters as much as the label. Steam does not politely walk across the room to reach the grille.
Use the fan CFM rating as a starting point, then adjust for duct length and bends. A long attic run with two elbows asks more from the fan than a short sidewall vent. If the current fan uses a 4-inch duct and the new model expects 6 inches, do not ignore that note. Some retrofit fans can adapt, but a smaller duct can raise noise and cut performance.
There is also a privacy angle. Some homeowners hate whisper-level fans because they want a little sound cover near bedrooms or guest areas. That does not mean buying a harsh unit. It means choosing a low, steady sound instead of a rattly one. Comfort is not silence at any cost. In a guest bath near a living room, a soft 1-sone fan may feel kinder than a near-silent model that makes every sink splash feel public.
Choose a quiet bathroom fan without buying weakness
A quiet bathroom fan earns its keep when it can stay on long enough to dry the room without bothering anyone. That is the reason sone ratings matter. ENERGY STAR explains that certified ventilation fans must meet requirements for sound, airflow efficiency, and rated performance under static pressure, and fan-light combinations use far less energy on average than standard models with lighting. ENERGY STAR ventilation fan guidance
Do not chase the lowest sone number as if it were the whole job. Some ultra-quiet fans are so hard to hear that people forget they are running. That can be fine with a timer or humidity sensor. Without controls, it can waste runtime or leave people unsure whether the switch worked. In a rental, guest bath, or kids’ bathroom, a timer switch may be worth more than a fancy grille.
The best choice often feels boring on paper: right airflow, low sound, proper duct size, and a housing that fits the ceiling without a messy patch. That boring match is what makes the room feel cared for. The fan turns on, the mirror clears, and no one talks about it.
One feature can be worth extra money: adjustable speed. A model that can be set to 80, 100, or 110 CFM gives you room to tune the fan after seeing the duct and hearing it in place. That flexibility helps when the house is older than the product page assumes.
Fit the New Unit Without Creating a Bigger Repair
Once the right fan is chosen, the ceiling decides how hard the day becomes. A replacement can be a neat one-hour swap or a dusty attic job with drywall repair, insulation work, and a new roof cap. The difference is usually hidden above the grille. That is why careful removal beats force every time. The goal is not to win a wrestling match with sheet metal. The goal is to leave the ceiling, duct, and wiring better than you found them.
Remove the old unit without tearing up the ceiling
Turn off power at the breaker, not only at the wall switch. Test before touching wires. Then pull the grille down, unplug the motor if it has a plug inside the housing, and look for screws or tabs holding the fan body to the joist. Many older units were nailed from the outside of the housing before drywall went up, so they do not always slide out politely from below.
If the fan was installed during original construction, you may need to cut or bend parts of the metal housing to remove it from the bathroom side. That sounds rough, but it can be cleaner than opening a larger ceiling hole. A compact oscillating tool, a short screwdriver, and patience can save a textured ceiling that would be hard to match later.
A common mistake is pulling on the duct before loosening the clamp or tape. In an attic, that tug can separate a joint several feet away. Then the new fan looks fine from below while moist air leaks into insulation. For homes in cold states like Minnesota, Michigan, or New York, that hidden leak can turn into frost in winter and staining in spring.
Keep the old unit nearby until the new one is mounted. The removed fan can answer small questions about wire entry, duct direction, and joist position. Tossing it too early is like throwing away the map while you are still in the attic.
Fix the duct path while the opening is exposed
The duct is the part homeowners are most tempted to ignore because it is not pretty. It is also the part that decides whether the new fan performs. Smooth metal duct usually moves air better than long runs of sagging flex duct. Shorter runs with fewer bends help the motor stay calm. The outdoor cap should open freely and close when the fan stops.
This is where bathroom ventilation becomes a house issue. Moist air should leave outdoors, not drift into an attic, crawlspace, garage, or wall cavity. If you find an old duct ending under insulation, pause the fan project and correct the vent route. A new motor cannot make a bad termination safe.
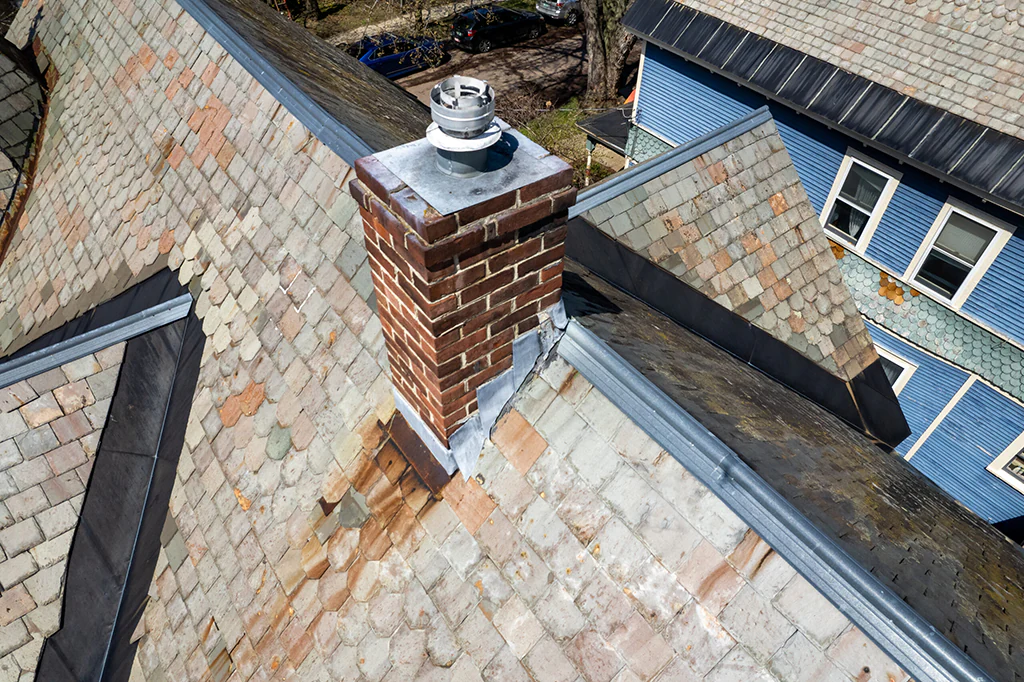
Think about the roof or wall cap too. A bird nest, stuck damper, or paint-sealed flap can make a new fan seem defective. In one common ranch-house setup, the fan is fine, the duct is acceptable, and the whole problem is a roof cap with a damper that barely opens. Ten minutes on the roof by the right pro can do more than a premium fan in the wrong path.
Air sealing around the fan housing also matters. Gaps between the housing and drywall can let humid room air slip into the ceiling cavity. Use the method allowed by the fan maker and local practice, then restore attic insulation without burying parts that need clearance. The small edges around the box are not glamorous, but they help the fan act like a system instead of a hole in the ceiling.
Wire, Test, and Live With the New Fan the Right Way
A bath fan is small, but it sits at the meeting point of electricity, wet air, ceiling framing, and outdoor venting. That mix deserves respect. Some homeowners can handle a like-for-like replacement. Others should bring in an electrician, especially when adding a light, heater, humidity sensor, or new switch leg. Saving money is not a win if the wiring becomes a future hazard. The best finish is the one you never have to reopen.
Respect switches, sensors, and local code
If the new unit has only a fan motor and the old unit had only a fan motor, wiring may be simple. Match the manufacturer’s diagram, use an approved box or compartment, and secure connections. If the new model adds an LED light, night light, heater, or sensor, the wiring can change fast. A heater fan may need its own circuit. A humidity-sensing fan may need constant power to think and switch power to run.
Local code also matters. Many U.S. jurisdictions follow versions of the National Electrical Code with local amendments. Bathrooms often bring GFCI rules, wet-location concerns, and fixture clearance questions into play. Do not guess because a video made it look clean. Your local inspector does not grade by video views.
This is a good place to connect your project with bathroom remodel safety upgrades, especially if the fan is part of a larger ceiling, lighting, or shower change. Work that starts as a noise fix can uncover old splices, brittle cable, or an overloaded switch box. Annoying? Yes. Useful to know? Also yes.
Controls deserve the same thought as the fan. A simple toggle relies on memory. A countdown timer relies on a habit once, then finishes the job. A humidity sensor watches the room, but it needs the right settings and steady power. The right control is the one your household will not defeat by accident.
Test performance after the grille goes on
Do not judge the new fan with the grille off. The grille can affect airflow and sound. Install it fully, then run the fan with the bathroom door open a crack or with the undercut doing its job. Air has to enter the room before the fan can exhaust it. A tight door with no supply path can make a good fan struggle.
The tissue test is crude but helpful. Hold a tissue near the grille and see whether it pulls firmly and evenly. Then run a shower and watch what happens to the mirror and ceiling after the water stops. A timer set for 20 to 30 minutes after bathing often dries the room better than a fan someone shuts off while steam is still rolling around.
Efficiency is a habit too. A low-watt fan wastes less energy than an old noisy unit, but only if it is used in a sane way. Pairing a quiet model with a timer, cleaning the grille a few times a year, and checking the exterior flap after storms will do more for long-term results than chasing premium features. For related planning, add this to a home moisture prevention checklist before you paint, caulk, or install new trim.
Listen again a week later. Fresh installations can loosen slightly as vibration settles, and attic duct straps can shift when insulation is moved back. A faint buzz or rattle is easier to fix early, before everyone accepts it as the new normal.
Conclusion
The best bath fan upgrade does not call attention to itself. It clears steam, protects paint, keeps odors from hanging around, and runs without making the room feel like a utility closet. That result comes from matching airflow, sound, duct size, wiring, and controls instead of treating the fan as a drop-in gadget. A good exhaust fan replacement should feel calm on day one and still make sense five years later. The smartest move is to inspect the old setup before shopping, because the ceiling opening only tells part of the story. Look at the duct. Check the vent cap. Think about who uses the bathroom and how long moisture stays after showers. Then choose the fan that fits the room, not the loudest promise on the box. Quiet operation is not a luxury here. It is what makes people leave the fan on long enough for it to do its job. Start above the ceiling, and the room below will age better.
Frequently Asked Questions
How do I know what size bathroom fan I need?
Start with the room size, then consider shower use, duct length, and bends. A small hall bath may need far less airflow than a large primary bath with separate wet zones. The label matters, but the installed duct path can change real performance.
Is a lower sone rating always better for a bath fan?
Lower sones mean less sound, but silence is not the only goal. Some bathrooms benefit from a soft sound for privacy. A timer or humidity sensor helps when the fan is so quiet that people forget it is on.
Can I replace a ceiling bath fan without attic access?
Often, yes, if the new housing is made for room-side installation and the existing opening works. Older nailed-in housings can make the job harder. Attic access helps with duct clamps, air sealing, and checking for hidden vent problems.
Why is my new bathroom fan still loud?
The fan may be fighting a tight duct, stuck exterior damper, poor mounting, or a ceiling vibration issue. A high airflow model connected to a small duct can also sound strained. Check the air path before blaming the motor.
Should a bathroom fan vent into the attic?
No. Moist air should be exhausted outdoors through a proper roof or wall cap. Venting into an attic can soak insulation, stain roof sheathing, and feed mold growth. A new fan does not fix a bad termination point.
Are humidity-sensing bathroom fans worth it?
They can be worth it in kids’ bathrooms, guest baths, rentals, and busy households where people forget the switch. The sensor helps the fan run when moisture rises. A timer switch can be a lower-cost option for many homes.
How long should I run the fan after a shower?
Many bathrooms dry better when the fan runs for about 20 to 30 minutes after bathing. The exact time depends on room size, airflow, duct design, and indoor humidity. Watch the mirror, ceiling, and towel smell for clues.
When should I hire an electrician for a bath fan?
Hire one when wiring changes, a heater is added, circuits are unclear, or the switch box looks crowded. You should also call a pro if local code requirements are uncertain. A simple fan can still touch wet-area electrical rules.