A plain bedroom wall can make good furniture look tired. Bedroom Wainscoting Installation gives that wall shape, shadow, and a built-in feel without turning the room into a full remodel. The point is not to make the space look formal or expensive for its own sake. It is to give the room a steady frame, so the bed, nightstands, lamps, and art feel placed with intent. That is why this project works so well for many U.S. homes, from newer builder-grade houses in Texas suburbs to older Cape Cod bedrooms in Massachusetts. Done with care, affordable architectural detail can come from trim, paint, spacing, and patience. Not from luxury lumber. The catch is that wainscoting looks simple only after the math is right. Height, panel width, outlet placement, baseboards, and paint finish all have to agree. Miss one of those, and the wall starts to feel homemade in the wrong way.
Bedroom Wainscoting Installation That Starts With Proportion, Not Tools
Most people want to start with a nail gun. That is the wrong first move. The wall decides the design long before the saw comes out. A small bedroom with an 8-foot ceiling needs a calmer layout than a large primary suite with space on both sides of the bed. Proportion is where the project either looks built-in or tacked on.
Why Height Changes the Whole Mood
Half-wall wainscoting is common because it feels safe, but “half” is often too high. In many bedrooms, a panel height between one-third and two-fifths of the wall looks better than a true halfway split. On an 8-foot wall, that often lands somewhere around 32 to 40 inches, depending on the baseboard, cap rail, bed height, and window placement.
Here is the odd part. Lower panels can make a room feel taller. That sounds backward, yet it works because your eye gets a grounded lower zone and more open wall above it. A high rail may look rich in a dining room, but in a bedroom it can fight the headboard and shrink the open space above the bed.
Before buying trim, tape the height on the wall with painter’s tape. Then leave it there for a day. Look at it from the doorway, from the bed, and from the hallway if the bedroom door stays open. A line that looks balanced while standing beside it may feel heavy when you see it across the room.
For a real-world example, think of a 12-by-13-foot bedroom in a newer Georgia home. The room has a queen bed, two windows, and plain drywall. A 42-inch rail might sound upscale, but it can cut through the lower window trim and crowd the lamps. A 36-inch rail may sit below the windows, clear the outlets, and make the headboard feel planned instead of squeezed.
The Grid Should Respect the Bed Wall
The bed wall is usually the main wall. It should set the rhythm for every other wall, even if you add panels around the full room. This does not mean every panel must match in size. It means the layout should feel centered on the bed, not centered on drywall seams, random studs, or the first measurement you took.
Start by marking the center of the bed wall. Then map the panel boxes outward. If the wall has two outlets, a return vent, or a window, adjust the layout so the interruptions feel intentional. Narrow slivers at corners are the enemy. One slim panel squeezed behind a nightstand will draw more attention than a slightly wider panel nobody notices.
This is where bedroom wall molding gets tricky. The wall may be straight enough for paint, but not straight enough for trim. Older homes in New Jersey, Pennsylvania, and Illinois often have walls that bow a little near corners. Newer homes can have the same issue near drywall joints. Use a level for the top rail, but also trust your eye where furniture and shadows meet.
A smart layout can hide an imperfect room. For example, if one corner is out of square, split the difference across several panels instead of forcing one perfect box at the end. The eye forgives small adjustments spread across a wall. It punishes one awkward panel that looks like an afterthought.
Choosing Materials That Look Expensive Without Acting Fragile
Once the layout feels right, materials become easier to choose. This is where many homeowners overspend. They buy thick trim, heavy panels, or ornate caps because they think weight equals quality. In a bedroom, restraint often looks better. The room is softer than a hallway or dining room, so the trim should add structure without shouting over bedding and light.
MDF, Pine, PVC, and Precut Kits All Have a Place
MDF is a strong choice for painted wainscoting because it is smooth, stable, and easy to finish. It does not have the grain movement of solid wood, which helps when you want clean painted lines. It can chip at corners, though, so it needs gentle handling before it is on the wall.
Pine gives a more traditional carpentry feel, but it can show knots and movement if it is not primed well. Poplar costs more, yet it paints nicely and holds sharper profiles. PVC can work in damp spaces, but a bedroom usually does not need that level of moisture resistance unless the wall backs up to a bath or the home has humidity issues.
DIY wainscoting panels can save time, especially for homeowners who do not own many tools. Precut molding kits are common now, and they can look good on a single accent wall. The risk is scale. A kit made for a generic wall may not line up with your bed, windows, outlets, or baseboard height. Cheap convenience can become expensive if the pattern feels wrong.
The best value often comes from simple panel molding, a cap rail, paintable caulk, primer, and careful spacing. That combination can beat a bulky kit because it is shaped around your actual room. A modest profile, installed straight and painted well, will look more permanent than thick trim placed without a plan.
Paint Finish Can Make Cheap Trim Look Custom
Paint is not the final detail. It is part of the design. A satin or eggshell finish can work on bedroom wainscoting because it catches light without looking glossy. Semi-gloss is easier to wipe, but it may highlight every uneven caulk line and nail hole. Flat paint hides flaws but can look dull on trim.
Color choice changes the read of the whole room. White wainscoting against colored upper walls feels classic, but it can also look chopped if the white is too bright. A softer off-white often sits better with carpet, warm wood floors, or beige bedding. Painting the lower wall, trim, and baseboard the same color can make budget materials feel custom.
The non-obvious move is to paint the wall behind the trim first. Do not wait until all molding is installed if you are using a darker color. A pre-painted wall helps reveal gaps, uneven spots, and strange shadows before the final coat. It also saves you from digging a brush into tight inside corners later.
For a California bungalow bedroom with warm oak floors, a muted greige lower wall and creamy upper wall may add calm without making the room feel old-fashioned. In a Florida bedroom with bright sun, a soft blue-gray lower wall can cut glare and give white bedding more depth. The trim is cheap. The color judgment is what makes it look considered.
Installing the Trim Without Making the Room Feel Overworked
Good installation is a series of small decisions. None of them are glamorous. Measure twice sounds tired, yet the better rule is different: measure the wall, then measure the room’s mood. A bedroom should still feel restful after the trim goes up. Too many boxes, harsh contrast, or fussy profiles can make the room feel busy.
Prep Work Saves the Finish From Looking Rushed
Empty the work wall if you can. If the bed is too heavy to move out, pull it to the middle and cover it well. Remove switch plates and outlet covers. Check whether the baseboard is staying. Sometimes the cleanest affordable route is to keep the baseboard and build above it. Other times, a thin old baseboard makes the new trim look stranded.
For homes built before 1978, treat painted surfaces with care. The EPA lead-safe renovation guidance is worth reading before sanding, scraping, or hiring anyone to disturb old paint. This matters in bedrooms because dust lands where people sleep, dress, and store clothes.
Use a stud finder, but do not trust it alone. Mark studs lightly with painter’s tape. Some trim pieces can be fastened with adhesive and brad nails, but rails and longer pieces need better hold. If you are renting, do not start this project without written permission. Removable molding sounds harmless until paint tears off during move-out.
There is one prep step people skip because it feels small: checking the floor level. If the floor slopes, a top rail that is level may look tilted against the furniture. Still keep the rail level, but understand the visual tension before you install. You may need to adjust bed skirt height, rug placement, or art above the rail to settle the room.
Cut Order Matters More Than Speed
Cut the longest horizontal pieces first. Then cut vertical stiles and panel molding. Dry-fit before adhesive. For picture-frame style trim, make sample corners from scrap pieces so you can see how the miter profile meets. A clean miter on one trim style can look open on another if the profile is rounded or uneven.
Bedroom wall molding rewards slow work. Pin one piece, step back, and check it from the door. Do not install an entire wall before looking from normal viewing angles. The wall may measure correctly and still feel off because a lamp, curtain, or headboard changes the balance.
Caulk should close hairline gaps, not rebuild bad cuts. Use a paintable caulk in thin lines, then wipe with a damp finger or cloth. Fill nail holes in two passes if needed, because filler can shrink. Sand by hand so you do not flatten the trim edges.
A practical example: on a 10-foot wall with three lower panels, the center panel behind the bed might be wider than the two side panels. A strict equal layout could put trim behind nightstands where nobody sees it. A furniture-aware layout gives the visible center more weight. That is not cheating. That is design listening to the room.
Keeping the Project Affordable While Still Looking Built-In
Affordability does not mean buying the lowest-priced pieces in the aisle. It means spending where the eye notices and saving where it does not. Bedroom wainscoting is forgiving because it is mostly paint, shadow, and proportion. The cost goes wrong when the project grows without discipline.
Where to Spend and Where to Save
Spend on a straight cap rail, decent primer, paintable caulk, and a trim profile that does not dent at the first touch. Save by using existing baseboards if they are in good shape. Save by treating one accent wall instead of wrapping the whole room. Save by keeping panel shapes simple.
DIY wainscoting panels make sense when time matters more than perfect sizing. For a guest room, a kit may be enough. For a primary bedroom wall with windows and outlets, custom-cut trim often looks better. The more fixed features a wall has, the less a one-size kit helps.
One counterintuitive way to save money is to make fewer panels. Many people think more boxes make the room look richer. Often they make it look cheaper because each box adds more cuts, more caulk lines, and more chances for crooked corners. Wider panels with quiet spacing can feel calmer and more grown-up.
Think about a ranch home bedroom in Ohio with a king bed and two small side windows. Four tight panels below the windows may create visual noise. Two wider panels, centered under the windows and aligned with the headboard, can cost less and look more settled. The savings come from editing, not cutting corners.
Small Details That Separate DIY From “Did a Carpenter Do This?”
The top rail should end cleanly at door trim, closet trim, and window casing. Do not let it die awkwardly into a thin strip of drywall. If the room has narrow casing, consider a small return piece or a careful stop block. Those tiny transitions decide whether the work feels built-in.
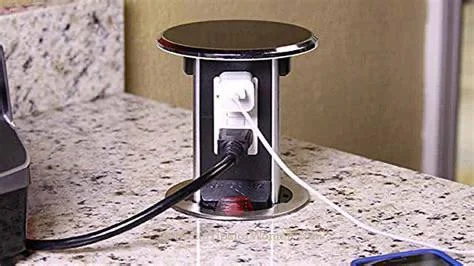
Outlet covers need attention too. If trim lands too close to an outlet, the cover plate may not sit flat. Move the panel layout before you install, not after. In some cases, you may need a box extender or a larger cover plate, especially when panel material changes wall depth. Electrical work should be handled safely, and local rules can vary.
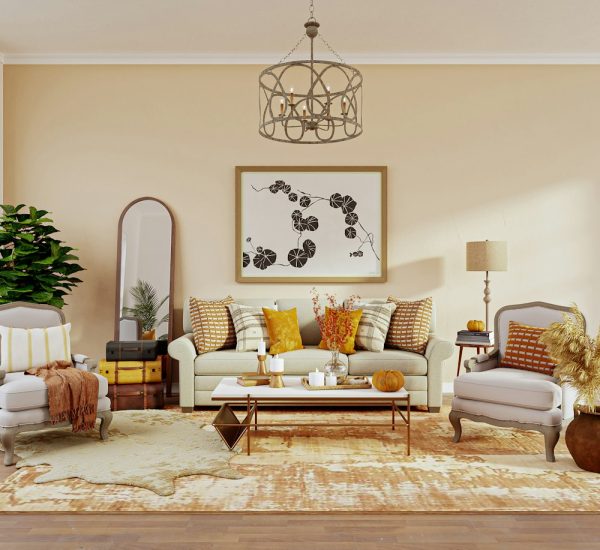
For styling after installation, leave breathing room above the rail. One large piece of art over the bed may work better than a cluster. Bedding can be simpler because the wall now has detail. A textured throw, two lamps, and calm curtains may be enough.
This is also where small bedroom renovation ideas and interior trim design tips can support the next choices. Wainscoting rarely fails because the trim was too plain. It fails because everything around it keeps competing. Let the wall do its job, then stop adding.
Conclusion
A bedroom does not need a major build-out to feel finished. It needs one strong architectural decision that works with the room instead of fighting it. Trim can do that when the height, spacing, material, and paint all serve the same idea. That is why Bedroom Wainscoting Installation is less about carpentry tricks and more about judgment. The best results often come from quieter choices: a lower rail, wider panels, softer paint, fewer cuts, and a layout built around the bed wall. You do not have to spend like a historic-home restoration to get affordable architectural detail. You do have to slow down before the first nail. Tape the wall. Study the sightlines. Respect outlets, windows, baseboards, and old paint risks. Then install with enough care that the wall looks like it belonged there from the start. If your bedroom feels flat, give it structure before you buy more decor.
Frequently Asked Questions
How much does bedroom wainscoting usually cost?
Cost depends on wall size, material, labor, and finish. A DIY accent wall with basic molding can stay affordable, while full-room paneling with professional labor costs more. Paint, caulk, primer, and tool needs should be counted before comparing prices.
Is wainscoting a good idea for a small bedroom?
Yes, if the scale stays calm. Lower rails, wider panels, and soft paint colors can make a small room feel more grounded. Heavy trim, dark contrast, or too many narrow boxes can make the same room feel crowded.
What height should wainscoting be in a bedroom?
Many bedrooms look best when the rail lands around the lower third of the wall. Bed height, window trim, outlets, and ceiling height should guide the final line. Painter’s tape helps test the height before trim goes up.
Can I install wainscoting without removing baseboards?
Yes, if the existing baseboards are thick and clean enough to support the new look. Thin or damaged baseboards may make the added trim look unfinished. In that case, replacing them can improve the whole project.
What is the easiest wainscoting style for beginners?
Picture-frame molding is often the easiest because it uses trim boxes applied to the wall rather than full panels. It still needs careful measuring and level lines, but it avoids larger sheet cuts and can work well behind a bed.
Should bedroom wainscoting match the wall color?
It can. Matching the trim and lower wall color creates a softer built-in look. Using contrast can work too, but it draws more attention to every line, gap, and corner. Bedrooms often benefit from the calmer approach.
Can renters add wainscoting to a bedroom?
Only with written permission from the landlord. Even lightweight or adhesive trim can damage paint and drywall when removed. Renters may be better served by temporary wall molding products, but those should still be tested in a hidden spot.
Does wainscoting add value to a home?
It can help a room feel more finished, which may support buyer appeal. Value depends on taste, installation quality, and whether the design fits the house. Poor spacing or sloppy caulk can hurt the impression more than plain walls would.